
Mastering Data Sorting in Dash Plotly with Sidebars and Hooks
Reading Time:
Reading Time:

Imagine you have a large CoVID dataset in the form of a 510 MB CSV file, and you want to display this data in a way that allows users to interact with it and sort it as needed. Loading this entire dataset into memory would be impractical, and manually sorting the data in a spreadsheet would be time-consuming and error-prone. This is where Dash Plotly comes in. With its powerful hooks and callbacks, Dash Plotly makes it easy to create dynamic user interfaces that can handle large datasets and provide users with the ability to sort and filter the data as needed. In Part 1 of this tutorial, we'll explore how to use Dash Plotly sidebars and callbacks to sort and filter data so that you can create powerful, interactive data visualizations that help you make sense of your data.
Callbacks in Dash Plotly are functions that get triggered when a user interacts with the app, such as clicking a button or entering text into an input field. These functions can then change the state of the app, trigger updates to the layout, or perform any other necessary actions.
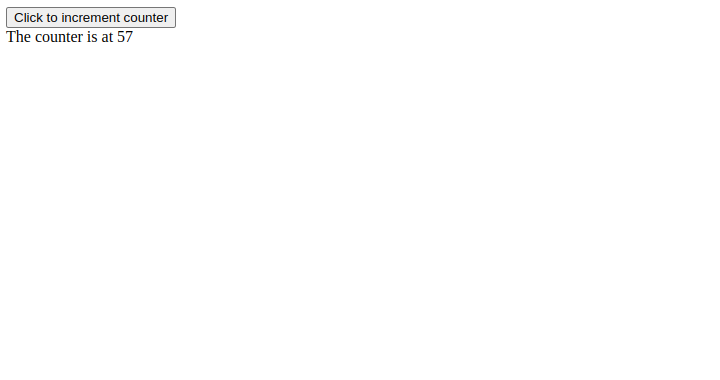
Here is an example that demonstrates how to use callbacks to create a simple counter app:
import dash
import dash_html_components as html
import dash_core_components as dcc
from dash.dependencies import Input, Output

app = dash.Dash()

app.layout = html.Div([
    html.Button('Click to increment counter', id='button'),
    html.Div(id='counter-display')
])

# Use the useState hook to manage the state of the counter
@app.callback(Output('counter-display', 'children'), [Input('button', 'n_clicks')])
def update_counter_display(n_clicks):
    if n_clicks is None:
        n_clicks = 0
    return f'The counter is at {n_clicks}'

if __name__ == '__main__':
    app.run_server(debug=True)
Note that the if n_clicks is None: check is necessary because the n_clicks argument will be None when the app first starts up, and we want to initialize the counter to 0 in that case.
Here's a deeper breakdown of the @app.callback(Output('counter-display', 'children'), [Input('button', 'n_clicks')]) line:@app.callback - This is a Python decorator that indicates that the following function is a callback in the Dash Plotly app.
Output('counter-display', 'children') - This is the output component of the callback. It specifies the ID of the component to update ('counter-display') and the property to update ('children'). In this example, the output component is a display that will show the number of clicks on the button.Input('button', 'n_clicks') - This is the input component of the callback. It specifies the ID of the component to watch for changes ('button') and the property of the component to watch for changes ('n_clicks'). In this example, the input component is a button, and the callback will be triggered whenever the number of clicks on the button changes.def - This is the definition of the callback function. The function takes the current value of the input component (the number of clicks on the button) as its input and returns the updated value of the output component (the number of clicks displayed on the screen).| Property/Argument | Description |
|---|---|
| Output | A tuple that specifies the output of the callback. The first element is the ID of the component to update, and the second element is the property of the component to update. |
| Input | A list of tuples that specify the inputs to the callback. Each tuple consists of the ID of a component and the property of the component to watch for changes. |
| State | A dictionary that allows you to pass data between callbacks. The keys of the dictionary are the names of the states, and the values are the current values of the states. |
| n_clicks | The property of a button component that stores the number of times the button has been clicked. Can be used as an input to a callback to trigger an update whenever the button is clicked. |
| children | The property of a display component that stores the content to be displayed. Can be updated by a callback to change the content of the display. |
| value | The property of an input component that stores the current value of the input. Can be used as an input to a callback to trigger an update whenever the value of the input changes. |
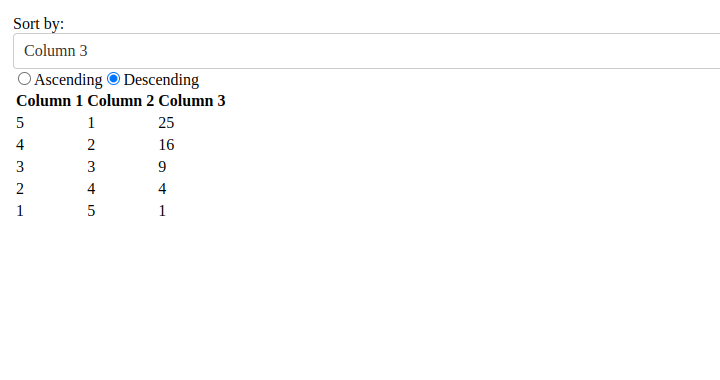
A sidebar is a common UI component that lets users sort and filter data in a table or other display. In Dash Plotly, you can create a sidebar using a combination of HTML components and callbacks to change the state of the app in response to user input.
Here's an example that demonstrates how to create a simple sidebar that sorts data based on the values in a column:
import dash
import dash_html_components as html
import dash_core_components as dcc
import pandas as pd
from dash.dependencies import Input, Output

app = dash.Dash()

# Create a sample data set
df = pd.DataFrame({
    'Column 1': [1, 2, 3, 4, 5],
    'Column 2': [5, 4, 3, 2, 1],
    'Column 3': [1, 4, 9, 16, 25]
})

# Define the layout of the app
app.layout = html.Div([
    html.Div([
        html.Label('Sort by:'),
        dcc.Dropdown(
            id='sort-column',
            options=[{'label': col, 'value': col} for col in df.columns],
            value='Column 1'
        ),
        dcc.RadioItems(
            id='sort-order',
            options=[{'label': 'Ascending', 'value': 'asc'}, {'label': 'Descending', 'value': 'desc'}],
            value='asc'
        )
    ], style={'width': '30%', 'display': 'inline-block'}),
    html.Div(id='table')
])

# Define the callback that updates the table based on user input
@app.callback(Output('table', 'children'), [Input('sort-column', 'value'), Input('sort-order', 'value')])
def update_table(sort_column, sort_order):
    sorted_df = df.sort_values(by=sort_column, ascending=(sort_order == 'asc'))
    table = html.Table(
        [html.Tr([html.Th(col) for col in sorted_df.columns])] +
        [html.Tr([html.Td(cell) for cell in row]) for _, row in sorted_df.iterrows()]
    )
    return table

if __name__ == '__main__':
    app.run_server(debug=True)
The layout of the app consists of a dropdown menu and a set of radio buttons in a sidebar, and a table that displays the data. The callback update_table is triggered when the value of either the dropdown menu or the radio buttons changes. The callback sorts the data in the df DataFrame based on the selected column and sort order, and returns a new table to be displayed in the layout.
Here is a step by step explanation of the code:
app.layout = html.Div : This sets the layout of the app as a Div component.html.Div([ : This creates a new Div component that contains the following components.html.Label('Sort by:') : This creates a Label component with the text 'Sort by:'.dcc.Dropdown( : This creates a Dropdown component with the following properties.id='sort-column', : This sets the id of the component as 'sort-column'.options=[{'label': col, 'value': col} for col in df.columns], : This sets the options for the dropdown component to a list of dictionaries, where each dictionary represents a column in the dataframe df with 'label' and 'value' keys.value='Column 1' : This sets the default selected value in the dropdown component as 'Column 1'.dcc.RadioItems( : This creates a RadioItems component with the following properties.id='sort-order', : This sets the id of the component as 'sort-order'.options=[{'label': 'Ascending', 'value': 'asc'}, {'label': 'Descending', 'value': 'desc'}], : This sets the options for the RadioItems component to a list of dictionaries, where each dictionary represents either 'Ascending' or 'Descending' with 'label' and 'value' keys.value='asc' : This sets the default selected value in the RadioItems component as 'asc'.], style={'width': '30%', 'display': 'inline-block'}) : This sets the style of the Div component to have a width of 30% and display as an inline-block.html.Div(id='table') : This creates a new Div component with id 'table' that will be used to display the sorted table.@app.callback(Output('table', 'children'), [Input('sort-column', 'value'), Input('sort-order', 'value')]) : This creates a callback that updates the 'children' property of the 'table' Div component. The inputs to the callback are the 'value' property of the 'sort-column' Dropdown component and the 'value' property of the 'sort-order' RadioItems component.def update_table(sort_column, sort_order): : This is the definition of the update_table function that will be run when the callback is triggered. It takes two arguments, the selected 'sort-column' value and the selected 'sort-order' value.sorted_df = df.sort_values(by=sort_column, ascending=(sort_order == 'asc')) : This sorts the dataframe df based on the selected 'sort-column' value in either ascending or descending order based on the selected 'sort-order' value.In conclusion, this tutorial has provided a comprehensive overview of hooks and callbacks in Dash Plotly. You learned how to use hooks to add state to your components and respond to changes in their properties, as well as how to use callbacks to update the display whenever an input changes. Additionally, we provided a cheat sheet table for both hooks and callbacks, which can be used as a quick reference while building your dashboards.
It is recommended to bookmark this page or take note of the tables provided, as they will come in handy as you continue to build interactive dashboards in Dash Plotly. The knowledge you gained from this tutorial will lay the foundation for the next part, where we will work with a large CSV dataset and explore libraries and techniques for efficiently handling large datasets. With the combination of hooks and callbacks, you will have the tools necessary to create robust and scalable dashboards.
In the next part of this tutorial, we will work with a large CSV dataset that is 510MB in size. We will explore libraries and techniques for efficiently handling large datasets, and we will use the knowledge we gained in this tutorial to sort and manipulate the data. By the end of this tutorial, you will have a solid understanding of how to build robust and scalable dashboards in Dash Plotly.

